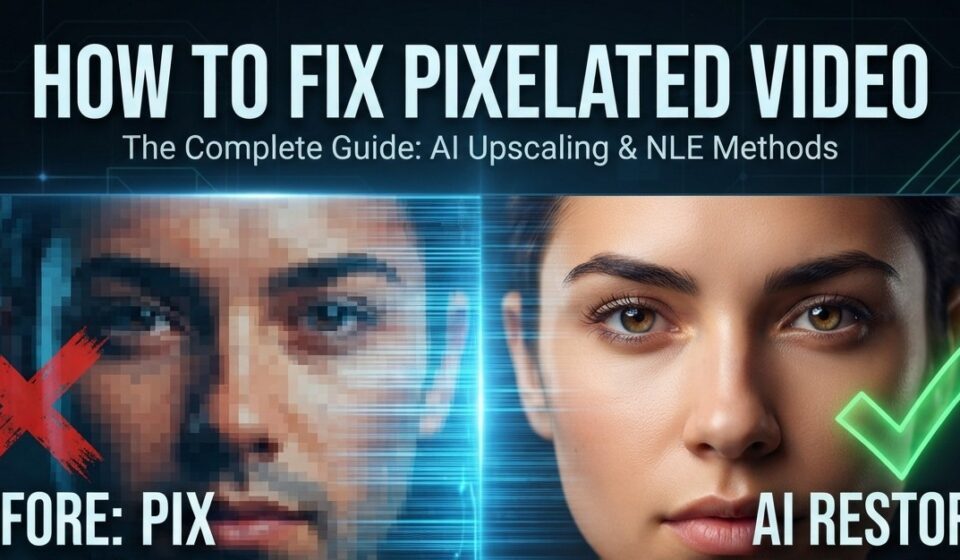

To fix a pixelated video immediately, run your original source file through a neural network video upscaler—such as Topaz Video AI for desktop or CapCut for browser-based editing—to reconstruct missing pixel data, reduce macro-blocking, and sharpen soft edges. If you prefer not to use AI or want to avoid cloud uploads, you can reduce visible pixel blocks manually in Adobe Premiere Pro or DaVinci Resolve by combining temporal noise reduction with subtle unsharp masking and debanding filters.
Unlike traditional video editors that simply stretch existing pixels (resulting in blurry, smeared frames), modern restoration workflows analyze adjacent frames to rebuild lost textures. Below is the complete, technical blueprint for diagnosing pixelation, choosing the right repair tool, executing both AI and traditional NLE fixes, and configuring export bitrates so your footage never degrades again.
Best Tools to Fix Pixelated Video (AI & Traditional)
Selecting the right restoration tool depends on your source footage’s severity, hardware capabilities, and privacy requirements.
| Tool / Software | Best Use Case | Platform | Pricing Model | Max Output & Key Strength |
| Topaz Video AI | Heavily compressed, archival, or low-res client footage | Windows, macOS, Web (Topaz Studio) | ~$299/yr (Personal) or $59/mo | Up to 4K+; 19 specialized AI models (Proteus, Iris, Starlight) for face recovery and de-artifacting. |
| DaVinci Resolve Studio (Super Scale) | Integrated post-production & clean 1080p-to-4K scaling | Windows, macOS, Linux | ~$295 one-time license (often discounted to ~$236) | Up to 8K / 32K; Neural Engine Super Scale + UltraNR directly inside your color/edit timeline. |
| CapCut AI Video Upscaler | Fast social media clips & mobile videos | Web Browser, iOS, Android, Desktop | Free tier available; Pro ~$8/mo | Up to 4K; Zero-install cloud processing optimized for quick vertical/social turnarounds. |
| Video2X / Real-ESRGAN | Open-source local upscaling & anime/animation | Windows, Linux, macOS | 100% Free (Open-Source) | 4x+ scaling; Unlimited local GPU rendering with no watermarks or subscriptions. |
| Adobe Premiere Pro | Non-AI manual cleanup & debanding | Windows, macOS | Creative Cloud Subscription | Native timeline resolution; Uses Detail-Preserving Upscale, Median, and Unsharp Mask without cloud uploads. |
Why Do Videos Become Pixelated or Blurry? (Diagnostic Checklist)
Before processing your file, verify what is actually causing the visual degradation. Applying a resolution upscaler to motion-blurred footage—or trying to fix a streaming glitch—wastes rendering time.
- Low Native Resolution: Footage captured at 480p (SD) or 720p lacks the pixel density required for modern 4K displays, exposing jagged edges when viewed full-screen.
- Aggressive Codec Compression (Macro-Blocking): Platforms like WhatsApp, Instagram, and X re-encode uploads using aggressive H.264/H.265 compression. This groups adjacent pixels into uniform squares (“macro-blocks”), especially during fast motion or in dark shadows.
- Starved Bitrate: Even a 1080p or 4K video will look pixelated if recorded or exported at an insufficient data rate (e.g., under 4 Mbps for 1080p), causing color banding and blocky artifacts.
- Digital Zoom or Heavy Cropping: Cropping 200% into a 1080p frame leaves you with an effective resolution of 540p, stretching individual pixels beyond their visual threshold.
- Optical Blur vs. Pixelation: Missed camera focus or a slow shutter speed causes blur (smeared light across pixels), whereas compression and low resolution cause pixelation (visible square grid boundaries).
- Adaptive Bitrate Streaming Drops: Unstable or congested internet connections force players like YouTube and Netflix to temporarily drop stream quality.
Diagnostic Rule: Always inspect the raw local file on your hard drive before editing. If the local file looks sharp in VLC or QuickTime, do not upscale it—your issue is purely upload compression or playback bandwidth.
How Does AI Video Upscaling Actually Work?
Traditional video editors rely on mathematical interpolation (such as bilinear or bicubic resampling). When enlarging a frame by 200%, interpolation simply calculates the average color between neighboring pixels and inserts a blended pixel in between. Because no new edge data is created, the image inevitably turns soft and muddy.
AI super-resolution replaces guesswork with deep learning neural networks:
- Multi-Frame Temporal Analysis: Rather than looking at a single still image, video-specific AI models examine 3 to 7 consecutive frames simultaneously to distinguish true scene detail from random compression noise.
- Artifact & Deblocking Removal: Pre-processing layers strip away H.264/H.265 macro-blocks and mosquito noise before enlarging the frame.
- Generative Texture Synthesis: Trained on millions of paired low-res and high-res clips, the model predicts missing micro-details—reconstructing individual strands of hair, skin pores, fabric grain, and crisp typography edges.
Method 1: How to Fix Pixelated Video with AI (5-Step Workflow)
Follow this standardized post-production workflow to restore low-resolution or compressed video using an AI enhancer like Topaz Video AI or an online cloud upscaler.
Step 1: Retrieve the Uncompressed Master File
Track down the earliest generation of the video file available. If a client sent you a clip via messaging apps, ask for the original camera file via Google Drive, WeTransfer, or AirDrop. Starting with a source file that retains even 15% more bitrate dramatically reduces AI “hallucinations” (unnatural plastic textures).
Step 2: Select the Appropriate AI Model
Match the neural network model to your specific type of visual damage:
- For heavily compressed social/web clips: Choose a de-artifacting model (e.g., Proteus or Artemis in Topaz) designed to strip macro-blocking first.
- For talking-head interviews or portraits: Use a face-recovery model (e.g., Iris) to prevent eyes and teeth from warping.
- For 2D animation or screen recordings: Use an animation-specific model (e.g., Real-ESRGAN AnimeVideo or Gaia CG) to keep flat colors clean and line art razor-sharp.
Step 3: Set Your Upscaling Multiplier (2x vs. 4x)
Avoid blindly cranking every video to 4K or 8K.
- 2x Upscale (Recommended for most repairs): Scales 720p to 1440p or 1080p to 4K. This strikes the cleanest balance between detail recovery and natural filmic texture.
- 4x Upscale: Reserve strictly for tiny legacy files (e.g., 360p or 480p archival footage). Upscaling heavily compressed 1080p footage by 4x often introduces artificial, overly sharpened outlines.
Step 4: Render a 5-Second Preview & Inspect at 100% Scale
Never commit to a full render without testing a difficult 5-second section containing faces, fast motion, and small text. Inspect the preview at 100% zoom:
- If skin looks waxy or overly smooth, lower the Denoise and Sharpen sliders by 15–20%.
- Add 1% to 2% subtle film grain in the output settings—this masks minor AI smoothing and tricks the human eye into perceiving higher organic detail.
Step 5: Export in a High-Bitrate Intermediate Codec
Export your repaired clip using ProRes 422 LT or high-bitrate H.264/H.265 (minimum 25–40 Mbps for 4K) so your hard-won detail isn’t immediately crushed by re-encoding.
Method 2: How to Fix Pixelated Video Without AI (Premiere Pro & DaVinci Resolve)
If you have strict data privacy rules, lack a dedicated GPU, or are working inside a standard non-linear editor (NLE), you can minimize pixelation manually using traditional signal processing:
- Apply Subtle Spatial Noise Reduction (Smoothing the Blocks):
- In Premiere Pro, apply the Median effect (found under Noise & Grain) and set the radius to
1.0or2.0. This blends harsh square pixel edges together without destroying major outlines. - In DaVinci Resolve, go to the Color page, open Motion Effects, and apply mild Spatial NR (
Threshold: 8–12) to smooth compression blocks.
- In Premiere Pro, apply the Median effect (found under Noise & Grain) and set the radius to
- Counteract Softness with Unsharp Mask:
- Because smoothing softens the image, immediately stack an Unsharp Mask filter below it. Set Amount to
40–60, Radius to1.0–1.5, and Threshold to5–10(raising the threshold ensures you sharpen true edges without re-sharpening the compression noise).
- Because smoothing softens the image, immediately stack an Unsharp Mask filter below it. Set Amount to
- Add Fine Film Grain to Eliminate Color Banding:
- Pixelated videos frequently suffer from blocky gradient bands in skies and shadows. Adding a light overlay of 35mm film grain breaks up uniform compression blocks and restores natural visual texture.
Technical Bitrate Benchmarks: How to Prevent Pixelation Forever
The most reliable way to fix pixelation is to record and export at data rates high enough to survive social media and streaming re-compression. Use these industry-standard target bitrates when rendering your final timeline:
| Target Resolution | Frame Rate | Standard H.264 Bitrate (SDR) | High-Efficiency H.265 / HEVC Bitrate | Best Use Case |
| 1080p (Full HD) | 24 / 30 fps | 10 – 15 Mbps | 6 – 10 Mbps | Standard YouTube, LinkedIn, & web embeds |
| 1080p (Full HD) | 60 fps | 15 – 20 Mbps | 10 – 14 Mbps | Gaming, sports, & fast-action footage |
| 1440p (2K) | 24 / 30 fps | 20 – 25 Mbps | 14 – 18 Mbps | High-detail desktop playback |
| 2160p (4K UHD) | 24 / 30 fps | 35 – 45 Mbps | 22 – 30 Mbps | Master YouTube uploads & client delivery |
| 2160p (4K UHD) | 60 fps | 50 – 65 Mbps | 35 – 45 Mbps | High-motion 4K broadcast & commercial work |
4 Essential Prevention Habits
- Always Export 1080p Uploads in 1440p or 4K: YouTube assigns its superior VP9 and AV1 codecs (with dramatically higher bitrates) to videos uploaded at 1440p or higher, even if the viewer watches on a 1080p screen.
- Light Your Scene Properly: Low-light recording forces your camera sensor to boost ISO, creating digital chroma noise that compression algorithms misinterpret as complex detail—resulting in severe pixelation.
- Use 2-Pass VBR (Variable Bitrate) Encoding: When exporting MP4 files, select VBR, 2-Pass instead of 1-Pass. The encoder analyzes the entire video first to allocate extra data to complex, high-motion scenes and saves space during static shots.
- Disable “Data Saver” Uploads on Mobile: In Instagram, TikTok, and WhatsApp settings, explicitly toggle on Upload at Highest Quality so your phone does not pre-compress your video before sending it to the server.
Also Read: How to Find Hidden Apps on iPhone
Frequently Asked Questions (FAQs)
Can VLC Media Player permanently fix a pixelated video?
No. VLC includes post-processing filters (accessible under Tools – Effects and Filters – Video Effects) such as Sharpen and Deblock that can improve playback appearance in real time, and converting a file in VLC can change its container. However, VLC does not use AI super-resolution to reconstruct missing pixels or permanently repair low-resolution files.
Why does my video look clear on my phone but pixelated on Instagram Reels or TikTok?
Social platforms automatically compress videos exceeding 1080p resolution or 30 fps using aggressive server-side encoders. To prevent pixelation on Reels and TikTok, export your video specifically at 1080 × 1920 pixels, 30 fps, H.264 codec, and a target bitrate of 10–15 Mbps, and enable High-Quality Uploads inside the app’s settings.
Does simply increasing the bitrate of a pixelated video fix it?
No. Re-exporting an already pixelated 480p video at 50 Mbps only creates a larger file containing the exact same blurry pixel blocks. High bitrates preserve quality during initial capture and export, whereas fixing existing pixelation requires AI upscaling or noise-reduction reconstruction.
Can AI completely fix out-of-focus or heavy motion blur?
AI deblurring models (such as Topaz’s Motion Deblur or DaVinci Resolve’s Motion Deblur) can recover mild camera shake and slight focus softness by estimating edge trajectories. However, if a subject is severely out of focus, the optical light data was never recorded by the sensor, meaning no software can authentically reconstruct true facial or text details.
What is the best free way to fix pixelated video without a watermark?
For desktop users with a modern graphics card, Video2X and Real-ESRGAN are completely free, open-source AI upscalers with zero watermarks or duration limits. For quick browser-based edits without powerful hardware, CapCut’s online AI Video Upscaler offers a free tier that cleans up short clips for social media without forcing a watermark.