
Four apps, one tutorial, and a workflow that falls apart before you even hit record. That is what happens when your screen capture, webcam, audio, and editing tools all live in different places. Every export and re-import chips away at quality, and every app switch pulls your focus further from the actual content you are trying to make.
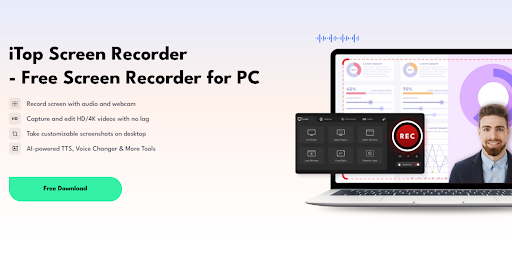
I ran into this exact wall for months until I found the iTop Screen Recorder. It combines screen recording, webcam capture, audio recording, screenshots, video editing, and AI tools into a single Windows application, so I no longer have to jump between different programs. If you have been searching for a reliable screen recorder for a PC that actually keeps up with your workflow, this is where I would start.
Why Windows Users Need a Versatile Screen Recorder for PC
Before looking at what makes iTop stand out, it helps to understand why I now prefer one flexible tool instead of a stack of separate apps.
The Real Cost of Switching Between Multiple Recording Tools
I learned this the hard way while recording a product walkthrough. I captured my screen in one app, recorded my voice in another, and then spent extra time trying to line everything up during editing. The audio was slightly out of sync, and I ended up recording the narration again.
- I lost quality every time I exported and re-imported files.
- I wasted time switching between different interfaces instead of creating content.
- I dealt with audio sync issues because everything was recorded separately.
What Versatility Actually Means in a Recording Tool
For me, versatility means having everything I need inside one application.
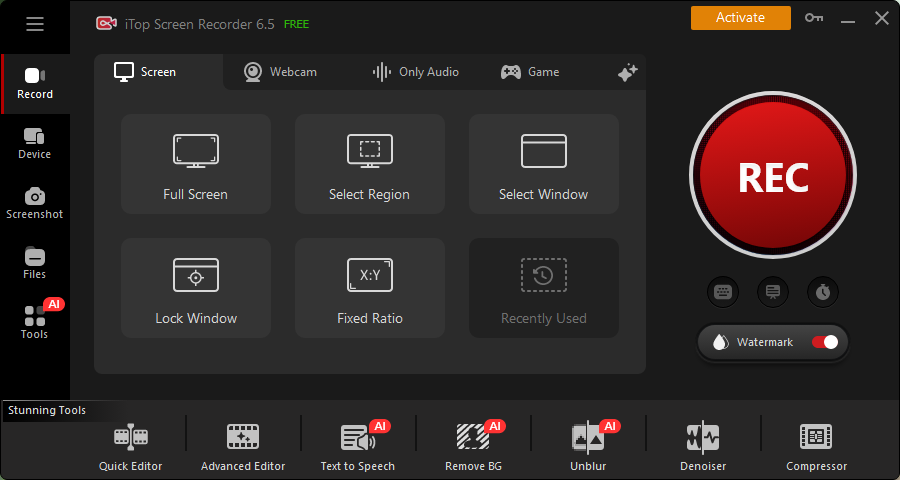
- I can switch between full screen, custom region, and window recording in seconds.
- I can record my webcam and screen together without installing another program.
- I can take screenshots, edit videos, and export everything without leaving the software.
iTop Screen Recorder at a Glance
Before diving into the features, I checked the latest version to see what I would be working with. Here are a few quick details about the software I tested.
- The software is available as freeware, which meant I could start using its core features without paying upfront.
- It supports Windows 11, Windows 10, Windows 8, and Windows 7, making it compatible with most Windows computers.
Throughout my testing, the latest version ran smoothly and included the newest recording, editing, and AI features introduced in this release.
Core Features That Make iTop Screen Recorder Versatile on Windows
After using it for different projects, I realized the versatility comes from how many tasks it handles inside one application.
Flexible Screen Capture for Any Recording Scenario
I can capture my full desktop for walkthroughs, record a selected region for tutorials, or focus on a single application window for cleaner presentations. I also like the Window Lock feature because it keeps recording the selected window even if another application appears in front of it.
I also noticed it supports recording in up to 4K, and when my hardware could handle it, the recordings stayed smooth at up to 60 FPS.
Webcam and Audio Recording Built for Presentations
The webcam recording software for Windows inside iTop lets you overlay your face on any recording, and you control exactly how it looks.
- It can blur, remove, or replace my webcam background without setting up a green screen.
- The built-in denoiser helps reduce background noise while I record.
- I can even save my microphone audio separately whenever I need more flexibility during editing.
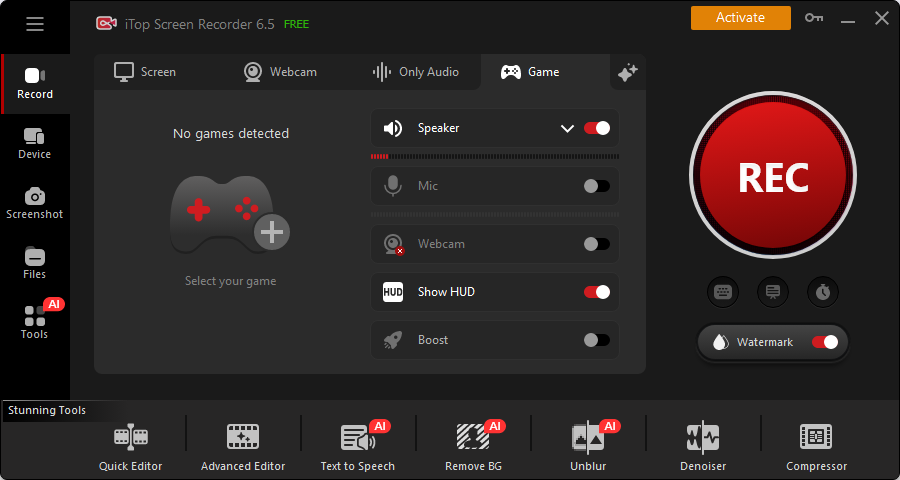
Game Mode for Smooth Gameplay Recording
I tested the dedicated Game Mode while recording a fast-paced shooter session, and the hardware acceleration kept my frame rate steady. Nothing dropped, and my CPU usage stayed low enough that the game itself never lagged.
Screenshots, Editing, and AI Tools in One Place
One feature I did not expect to use so often was the built-in screenshot tool. Besides recording videos, I can capture the entire screen, an active window, a scrolling page, or a custom region without opening another utility.
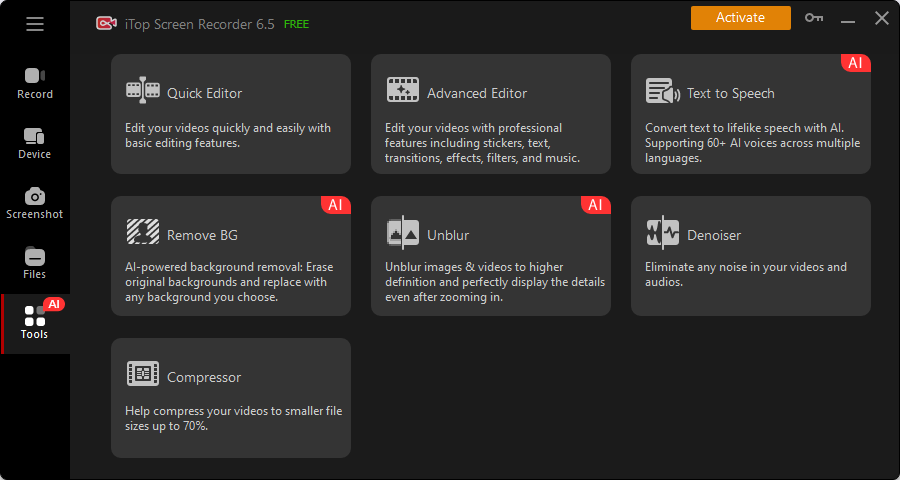
After recording, I normally jump into the editor. For quick changes, I trim clips, add subtitles, stickers, filters, or background music with the Quick Editor. If I need more control, the Advanced Editor lets me add transitions, effects, text, speed adjustments, and even work with multiple tracks.
The latest AI tools have also been useful. I tried the AI Text to Speech feature for a short demo, and it created a natural-sounding voiceover in just a few clicks. I also experimented with Remove BG to replace image backgrounds and used the AI Unblur tool to improve the clarity of older images. Before uploading, I usually compress my videos, which keeps file sizes smaller without noticeably affecting quality.
How to Record Your Screen with iTop Screen Recorder
With the features covered, here is exactly how I usually record my screen from start to finish.
Step 1: Download and choose your capture mode
I started by downloading this screen recording software and installing it on my Windows PC. After launching it, I chose the recording mode that matched my project.
For tutorials, I usually select a custom region because it keeps viewers focused on the important part of the screen. When I need to keep tracking the same application, I use Window Lock so the recording stays focused even if another window pops up.
Step 2: Set your audio source
Before recording, I choose whether I want system sound, microphone audio, or both. I almost always enable the built-in denoiser because it removes background noise while I record and saves editing time later.
Step 3: Add your webcam if needed
When I want a more personal presentation, I turn on the webcam overlay. If my workspace looks messy, I simply blur or replace the background instead of cleaning the room.
For longer tutorials, you can also use the built-in teleprompter because it helps me stay focused while speaking.
Step 4: Record, edit, and export
Once Record is pressed, the recording can be paused or resumed whenever needed. After stopping, the editor opens immediately, making it easy to trim mistakes, add subtitles or effects, and export the finished project in the required format. Large videos can also be compressed before uploading.
Another useful feature is the option to share videos directly to platforms like YouTube after exporting, without moving files between multiple applications.
In my experience, this entire process of recording with a reliable screen recorder for PC takes under ten minutes. Keeping capture, audio, webcam, and editing inside one application makes a real difference compared to juggling four separate tools.
Pros and Cons of iTop Screen Recorder for Windows
What I liked
- Screen recording, webcam, audio, and screenshots can all be handled from one application.
- Having both Quick Editor and Advanced Editor built in makes editing more flexible.
- The AI tools, especially Text to Speech and Remove BG, help save extra editing time.
- Recording Schedule, mouse click effects, and watermark customization are useful extras that turned out to be more practical than expected.
What could be better
- Some AI features depend on an internet connection.
- Because the software includes so many tools, it took me a little time to learn where everything was.
Also Read: Best Laptop for Home Use in the USA (2026)
Final Thoughts
How do you record any screen activity on Windows without juggling four different apps? With iTop Screen Recorder, you no longer have to. You can capture your screen, webcam, and audio together, edit inside the same app, and export a finished video in one sitting.
If you want a reliable, all-in-one screen recorder for PC, iTop Screen Recorder delivers flexible capture modes, clean audio tools, and built-in editing without the app switching. Start recording your next tutorial, gameplay clip, or presentation today.
So download iTop Screen Recorder to give it a try!